One of my favorite things to do with my kids, is to find fun crafts they can do with me, especially when the crafts are something they can give to others and feel proud of. This year, for Valentines day, because I’m about ready to have our 3rd little (and final), I wanted to do something fun but also fairly simple and inexpensive.
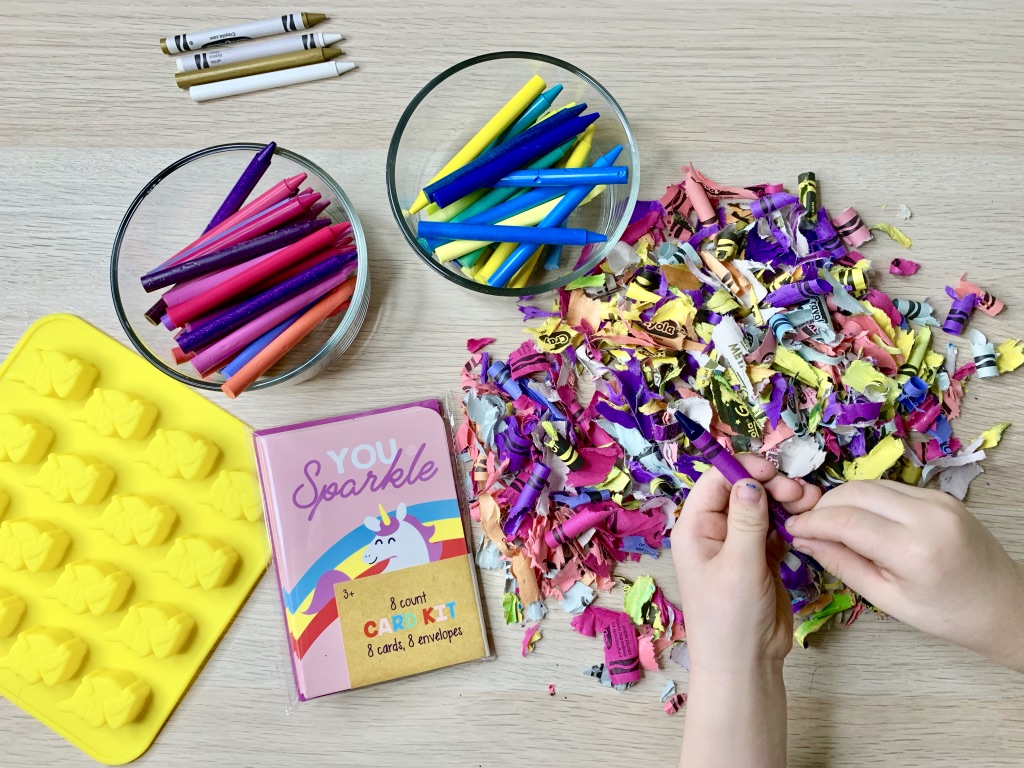
So while on one of my many Target runs, I noticed Valentine themed items had already started to fill their dollar section. I found these cute unicorn & dinosaur valentine cards and stickers. I thought it would be cute to make little gift bags with these cards and stickers then we added pencils and I wanted to find something else but thought it could be something she could help me make. Her school doesnt allow treats of any kind so homemade cookies or candy was out. So I decided to try melting crayons! This isnt a new craft, but it was a first for me.

I went on to Amazon.com and found silicon molds for unicorns, hearts and dinosaurs, you can also find similar molds from $3-$6 at a craft store like Michael’s. I bought 2 boxes of Crayola Crayons the 96 pack, however looking back 1 box was probably plenty – but really, you can never have too many crayons when you have littles. Once all the products arrived I got started.
*NOTE* As a full-time working mom, Amazon or ordering online is usually my number one choice because things can just come to me and I can order after the kids go to bed or at work during my breaks.
The first thing I did was seperate out the crayons that matched each card theme the best, pinks, purples, yellow and teal colors for the unicorn cards, and then brown, green, and oranges for the dinosaur cards, then for the heart molds I pulled out some different shades of reds and pinks. It’s important to find colors that will look well together and not just mix random colors because when they melt they can bleed together a bit and can make some not so flatering combinations.
The hardest part of this entire project and only because it’s time consuming is peeling the paper off all of these crayons. HOWEVER…I also learned that I didn’t need to peal as many as I thought I did. For each silicon mold sheet/tray I used about 10-15 crayons total. You can probably get a few more in there depending on the size of the molds you use, but basically each mold should be filled with crayons, and once it’s baked it will fill up about half way or so after it’s been melted down.

I broke each crayon into about 4-5 pieces using a knife and a cutting board. The pieces can fly as you push the knife down to cut them, so be aware of that. (You can see how I did this and put it into the tray in my video below).


Once your molds are full they are ready to go into the oven!
Set your oven to BAKE at 230º and then place your molds onto a metal baking sheet to keep them flat. You’ll bake for about 15 minutes.
Once they are done baking, remove the silcon mold from your baking sheet and put it into a cool space or on a cold countertop. The crayon molds should harden within about 30-40 minutes.
Once they are hardened you can pop them out of the molds and they are all done! So easy and such a fun thing to do with the kiddos!
Watch the full video tutorial here:
In this video tutorial I show you how to make this super easy gift for your child’s friends at school, party favors, valentines (like we did) or any little gift that can be done with you and your child easily…also, it’s pretty mess free for the most part, so it’s a great craft project to do with your littles. Just make sure you’re there to help them along, especially with cutting.
———————————————————
WHAT YOU’LL NEED:
Silicon Molds
Knife
Cutting Mat
Crayola Crayons (used and prebroken or you can buy a new box no judgement here!)
Oven set to bake at 230º you’ll bake each mold for 15 minutes on a baking sheet to keep the flexible mold flat on the oven rack.
The Valentines made in this video were made for Valentines Day. I went to Target and checked out their dollar section in January and found some early pickin’s on their new Valentine line. The packs of cards were $3 each, and the sticker packs were $1 each, and the pencil packs were also $1 each! Great way to do something a little different and fun for the kiddos!
LINKS TO THE PRODUCTS I USED IN THE VIDEO:
Dinosaur Silicon Molds (includes an owl mold)
Unicorn & Heart silicon molds (includes gummy bear shaped mold)
———————————————————
DID YOU TRY THIS TUTORIAL??
What did you think? Leave a comment below or feel free to email me pictures or share on Instagram and tag @oliveandapron!

I’m Devan, a mom of 3, a wife, a full-time working mom, business owner, PTA parent, and hyperfixation extrodinare (thanks ADHD).
On my blog you’ll blog posts about DIY crafting, home projects, celebrations, and of course a few recipes. I believe in always learning and growing, and most importantly quality time with friends, family and especially some self care.

This is so much fun, you’ve just inspired me to pick this up as a snow day project with the kiddos 🙂 So excited for the Unicorn molds!
Yay! <3 It really is fun, I think now that I know how easy it really is – it's definitely going to be a go-to carft project for gifts like this or party favors! <3